Surveys
FeaturesCREATE AND DISTRIBUTE CUSTOM SURVEYS IN 5 EASY STEPS!
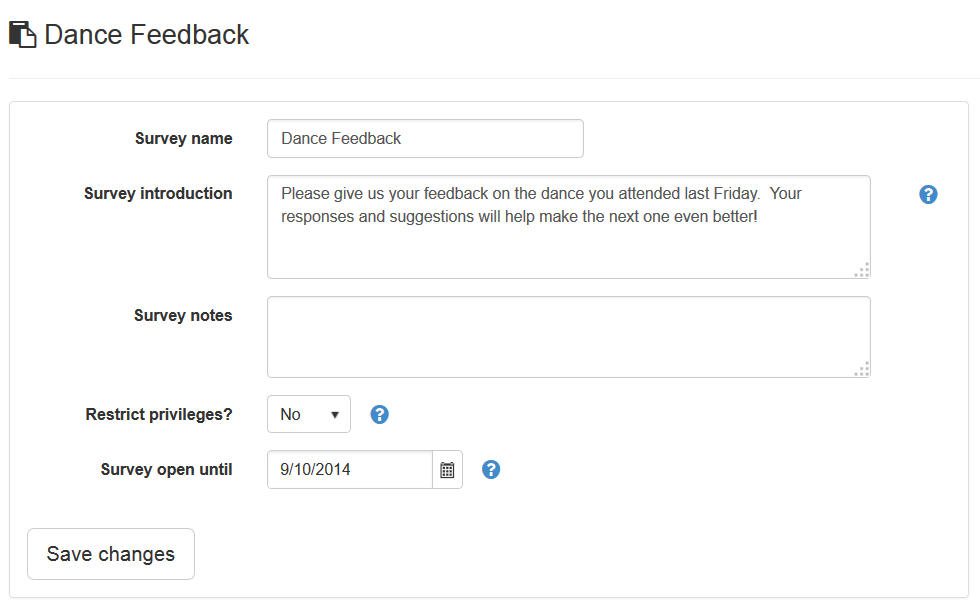
Step 1: Create the Survey
Add a new survey and choose from several configuration options. You control the survey end date and adjust as necessary at any time.
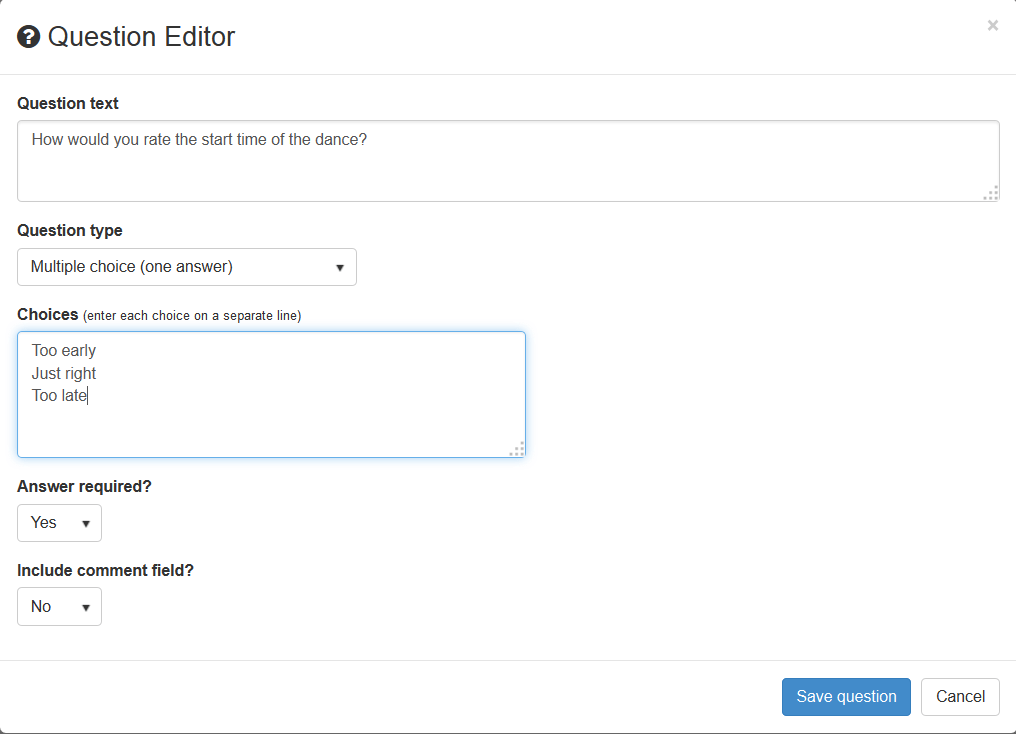
STEP 2: DESIGN YOUR QUESTIONS
Add questions to your survey and adjust the order as necessary. You can choose between the following question types:
- Multiple choice (one answer)
- Multiple choice (multiple answers with maximum)
- Comment box
Choose whether or not to make answers required for each question and optionally include a comment field.
Preview your survey to make sure it looks just right.
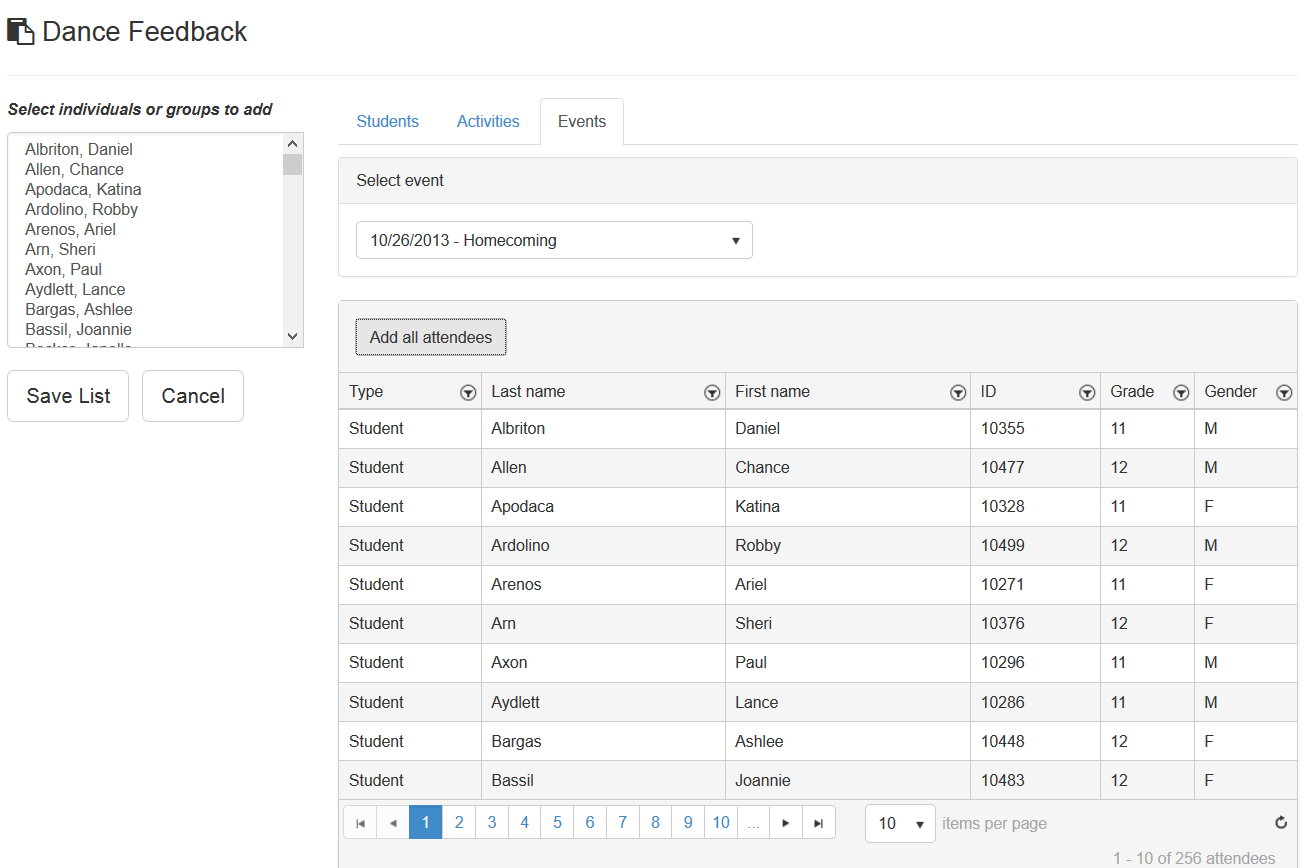
STEP 3: DISTRIBUTE THE SURVEY
Choose the eligible participants for the survey. Participants can be selected via multiple methods:
- individually
- by class
- by activity involvement
- by event attendance
- by type (student or staff)
Email survey invitations or create a secure, online survey link. You can choose from 7 different options to authenticate participants arriving at the survey location.
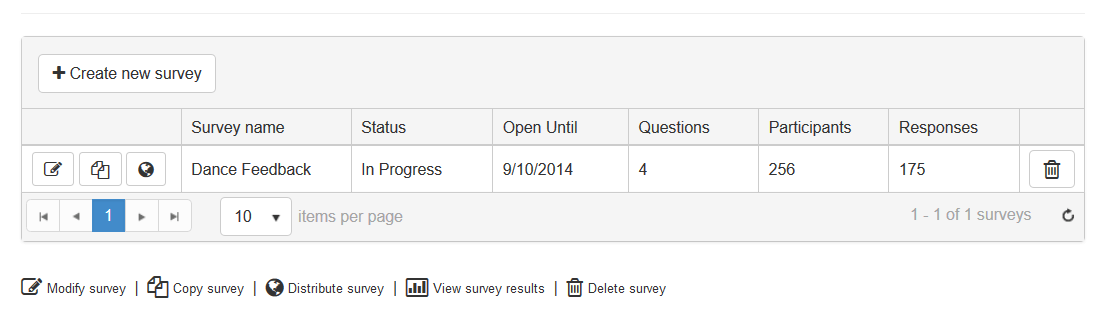
Step 4: MONITOR SURVEY PROGRESS
View the number of responses received after the survey has been distributed. See which participants have completed the survey and push out the survey end date if more time is required.
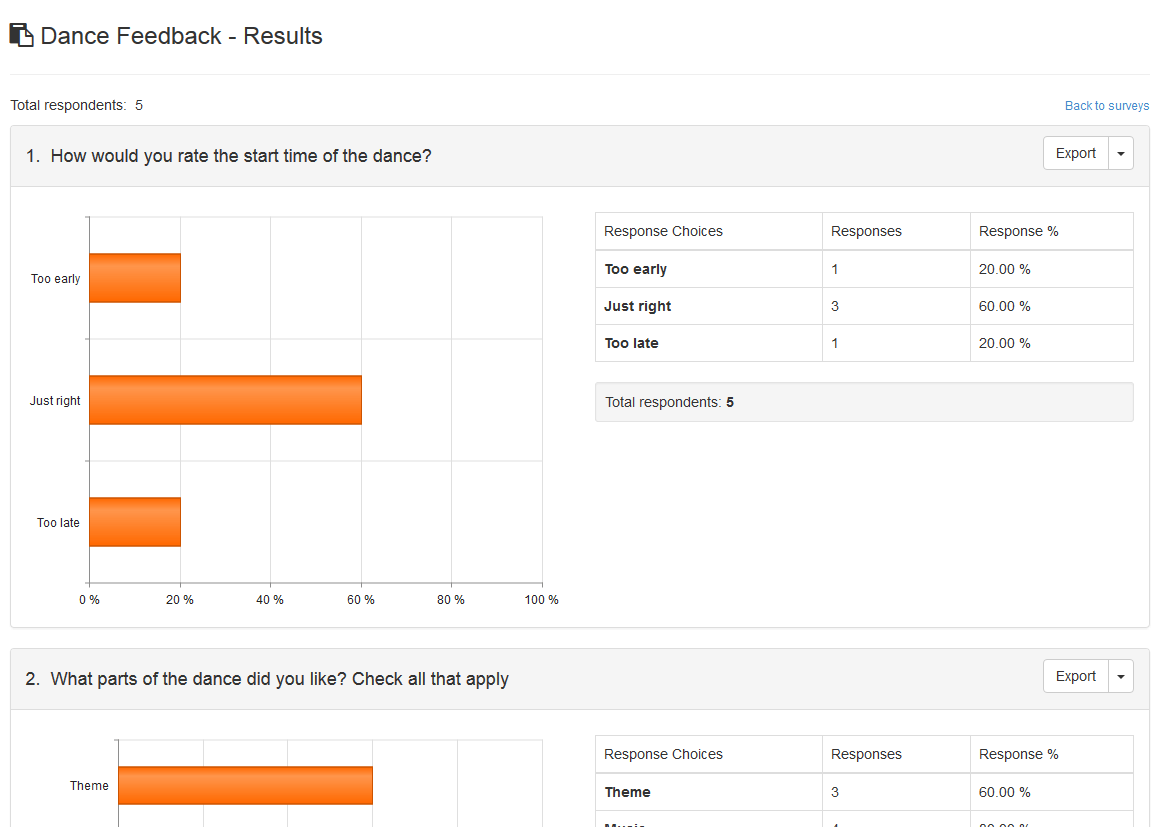
Step 5: View Results
After the survey end date has passed or has been closed manually, you can view the results. See the numeric data, along with a chart for each question. Results can be exported to PDF or Excel formats.